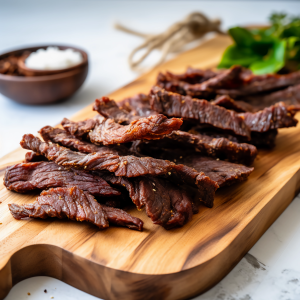
How to Slice Beef for Jerky - A Step-by-Step Guide
Discover the art of crafting perfect jerky with our step-by-step guide on 'How to Slice Beef for Jerky.' Learn the essential techniques for choosing the right cut, achieving ideal thickness, and preparing your meat for delicious homemade jerky. Whether you're a jerky enthusiast or a beginner, this simple and comprehensive guide guarantees mouthwatering, tender jerky every time. Get ready to savor the satisfying results of your jerky-making skills!
Equipment
- sharp knife - You'll use a sharp knife to slice the beef into thin, uniform strips. Slicing the beef properly is crucial for even drying.
- Cutting Board - A clean cutting board provides a safe and sanitary surface for slicing the meat.
- meat tenderizer (optional) - A meat tenderizer or mallet can be used to flatten and tenderize the beef strips, making the jerky more palatable.
- marinating container or plastic bag - To marinate the beef, you'll need a container or resealable plastic bag. This is where the beef absorbs the flavors of your chosen marinade.
- Dehydrator - A food dehydrator is a specialized appliance designed to remove moisture from foods. It's essential for drying the beef strips evenly and efficiently.
- oven (alternative) - If you don't have a dehydrator, you can use an oven set at a low temperature to dry the beef. A wire rack on a baking sheet can help with even drying.
- jerky racks or mash screens - In a dehydrator, you'll use jerky racks or mesh screens to lay out the beef strips, allowing proper air circulation for drying. In an oven, you can use wire racks or baking sheets.
- aluminum foil (optional) - You can use aluminum foil to line the bottom of the oven to catch any drips during the drying process. It makes cleanup easier.
- hygrometer (optional) - This tool can help you monitor the humidity levels during the drying process, which is especially important for achieving the desired jerky texture.
- airtight containers - Once your jerky is dried, you'll need airtight containers or resealable bags to store it and keep it fresh.
Ingredients
- Lean beef (such as flank steak or sirloin)
- Marinade and Seasonings
- Curing salt
- Black pepper
- Othe additional ingredients as per your prefered Jerky Recipe.
Instructions
Step 1: Choose the Right Cut of Beef
- Select a lean cut of beef for making jerky. Flank steak, sirloin, or round steak are excellent choices. Trim away any visible fat as it can cause the jerky to spoil faster.
Step 2: Partially Freeze the Meat
- To make slicing easier and more consistent, place the beef in the freezer for about 1-2 hours until it's partially frozen. The meat should be firm but not rock-solid.
Step 3: Prepare Your Workspace
- Clear and clean a cutting board to prevent cross-contamination. Ensure you have a sharp knife and, if desired, a meat tenderizer or mallet for even thickness.
Step 4: Slice the Meat
- Place the partially frozen beef on the cutting board. Slice the meat across the grain into thin, even strips. The thickness should be around 1/8 to 1/4 inch (3-6 mm). Slicing against the grain will result in a more tender jerky.
Step 5: Optional: Tenderize the Strips
- If you want your jerky to be extra tender, gently pound the strips with a meat tenderizer or mallet. This helps break down the muscle fibers and can improve the jerky's texture.
Step 6: Uniformity is Key
- Ensure that the strips are as uniform in size as possible. This consistency ensures that all pieces will dry evenly and at the same rate.
Step 7: Arrange the Strips
- Lay the sliced beef strips in a single layer on a clean, dry surface. If desired, you can place plastic wrap over them to protect against any potential contamination.
Step 8: Marinate or Season
- At this point, you can marinate or season the beef strips according to your preferred jerky recipe. Allow the meat to marinate for the recommended time.
Step 9: Dehydrate or Oven Dry
- Once your beef strips are well-seasoned, proceed with the drying process. This can be done in a food dehydrator or in the oven at a low temperature, following the instructions of your chosen jerky recipe.
Step 10: Enjoy!
- Once the beef strips are fully dried, you can store them in an airtight container or enjoy your homemade beef jerky. It's a delicious and protein-packed snack ready for your enjoyment!
Notes
Please note that the overall time may change based on factors such as the thickness of the beef strips and the specific equipment you use. It's essential to refer to your jerky recipe for precise drying times and temperature settings.
Nutritional info is an estimate and provided as courtesy. Values may vary according to the ingredients used. Please use your preferred nutritional calculator for more detailed and personalised calculations.
